
Growing A Garden: Seed Saving
Last Updated: Apr 13, 2025Saving seeds can be a daunting task. How do you know when the seeds are ready? What's the best way to harvest them? Where should you store them? Let's look at a few of those common questions and give some advice to make the task as streamlined as possible.
What is Seed Saving?
Seed saving, in gardening and agriculture, is the act of collecting the seeds that stem from herbs, grains, vegetables, and flowers. You can then store these seeds for use in future years.
Why Is Seed Saving Important?
So why would saving seeds benefit you? Well, there are a couple of reasons. To begin, saving your seeds will save you money over time. When you have to buy seeds yearly, the costs accumulate, and as with everything, seed prices gradually increase. On top of rising prices, you also run the risk of delayed orders when buying from online distributors. If you're like me and ordered seeds at the beginning of 2020, you may have found yourself sitting on a long waitlist, taking almost a month to receive anything.
Once you have your initial seeds, saving the seeds of the varieties you most enjoyed will take the guesswork out of later seasons. By selecting from the strongest and best-tasting plants, you pass on favorable genes to the next generation of vegetables.
By saving these open-pollinated seeds annually, you are creating local, generational varieties of plants that have acclimated to your hardiness zone or climate. These are known as heirlooms and are critical for every gardener to store. Heirloom varieties have a rich flavor, better nutrient density, and the ability to weather their climate, making them an Allstar of the backyard. Anyone who has bitten down on an heirloom tomato can attest to their flavors!
Heirlooms are the types of plants that our ancestors grew before the mass-industrialization of agriculture.
Unfortunately, the varieties of heirloom plants have diminished substantially over the last century. Tomatoes, once with 408 unique types, now have 79 in regular circulation. And what was once 544 cabbage variants has now been reduced to 28 varieties. These plants fell out of favor for the quick producing, simply shipped, monoculture varieties. But, with an increase to backyard gardens, it's possible to see a resurgence of heirloom varieties!
Table of Contents
- Open-Pollinated vs. Hybridized Seeds
- How Do I Know When a Seed Is Ready?
- How Do I Harvest the Seeds?
- Where Do I Store My Seeds?
- How Long Can My Seeds Be Stored?
- How About My Tomato?

Open-Pollinated vs. Hybridized Seeds
Above, I briefly mentioned open-pollinated plants, which differ from hybridized seeds. Both seeds are useful and provide delicious fruits and vegetables. Still, it would be best to collect only from open-pollinated varieties when it comes to saving seeds. Open-pollinated seed plants are the ones that are going to be pollinated by bees, butterflies, or even the wind. These plants are going to produce seeds that are hereditarily consistent with their parents, meaning you could expect an offspring similar in shape and flavor. Plants in nature function this way and optimally provide the best seeds for their climate to ensure their longterm survival.
Seed companies breed hybridized plants to possess favorable traits specific to modern agriculture, and not general resilience. By choosing particular characteristics from the parents (like fruit size, uniformity, storage length, etc.), growers spend years breeding the plants to pass the traits along to the offspring. Growing seeds collected from a hybridized plant may not produce fruits or vegetables similar to the parents. Instead, that genetic lottery may yield features closer to that of the grandparent varieties. And these plants often don't have many favorable characteristics, meaning you run the risk of your collected seeds resulting in weak or ill-producing crops.
Ultimately, both seeds work for your garden, but it's best to only collect from non-hybridized plants for the next year.
Dry Seed Storing
Peppers need to remain on the vine to ripen fully. Once it begins to wrinkle, you know you can harvest the pepper for seeds. No fermentation required. Simply cut the pepper and remove the seeds. Finally, spread them out flat and leave them until dry.
Peas and beans also need to be left to ripen on the plant until the very end. Wait until the pods have begun to brown, and the seeds rattle. Remove the pods from the plant, but let the seeds continue to dry indoors for an additional two weeks before shelling.
Now not all pods will remain in perfect form for you to harvest. If you have a plant with seed pods that are prone to bursting before you can gather the seed, consider tying a paper bag around the plant. When it is time, the pods will break into your container, making it easier for harvest.
Check For Seed Maturity Often
Once you start harvesting seeds, be sure to check back every couple of days to ensure you are catching plants at peak maturity. Every day you wait, the better chance an insect or animal will get to it before you. Collect from your healthiest plants with only the ripest fruits and vegetables. Avoid any cracked seed hulls because these will not last.
How Do I Know When a Seed Is Ready?
Not every plant produces seeds yearly. Before looking at when to harvest your seeds, begin by asking yourself whether your plant will go to seed this season.

Biennials
Some plants, like biennials, can take two years to produce flowers and seeds. Biennial plants include carrots and onions which need to remain in the garden over winter for seed production. Be sure to cross-check your plant's growing conditions and your plant hardiness zone if you want to collect seeds from these plants. You want to make sure the varieties you choose can survive your winters and sprout a second year.
Annuals
Luckily, most of our typical garden plants are annuals. These plants germinate, grow, and produce fruit full of seeds before dying off over a single year. In nature, animals would eat these fruit eagerly at peak ripeness. The seeds would then eventually drop from them elsewhere, repeating the process over the next year. These typical backyard annuals are going to include tomatoes, peppers, and lettuce, just to name a few.
Perennials
Finally, perennials are plants that will remain in the ground for multiple years and producing numerous crops. These plants are going to include your berries and fruit trees. Most perennials I have come across prefer to grow for a year or two before harvesting. Waiting allows the plant to focus on the development of its structure to produce better results in the following years. Be so be sure to check on growing information for your perennials before harvesting.
Vegetable Maturity Cues
It would be best to learn each fruit and vegetable's cues for maturity. Examine the plant for color changes, like fading flowers or browning plant heads. These could be the plant signaling the beginning of its end. By researching and anticipating these signs, you can better prepare for the seed harvest. When the time's right, instead of stressing to gather your supplies at the last minute, you can make quick work of the crop.
Collecting Seeds from "Wet Fruits"
If you like to collect seeds as you eat your produce, understand that you can harvest several "wet fruits" and vegetables before the seeds are mature. Plants like eggplants, cucumbers, and tomatoes are just a few examples of crops you may need to leave on the vine longer to produce mature seeds.
Dry vegetables, like beans, are also left on the vine only to be harvested when they are thoroughly dry and hard. This process could take up to a month after a typical harvest.
How Do I Harvest the Seeds?
Every plant is going to have a different harvesting method. Understanding beforehand where the seeds are on the plant helps make the process easier. Will you be collecting the fruit or vegetable or the seedpods that replaces your favorite annual flowers?
Prepare For Seed Harvesting
To begin, gather your essential tools:
- Knife or Scissors
- Spoon
- Paper envelopes or reusable container
- Pen

The Importance of Labelling
Regardless of what seeds you are harvesting, label your packages first before storing a crop. Labeling cannot be stressed enough, because once the seeds are out and dried, it becomes increasingly difficult to identify them. Telling a pepper from a bean is easy enough, but brassica seeds are a different story. Consider labeling packets with details that may help you next year. By keeping track of the type of fruit or vegetable and variety, you will remember which were your favorite foods.

Wet Seed Storing
Certain wet foods, like tomatoes and cucumbers, protect their seeds with a gel that needs processing before storage. First, spoon the seeds and gel into a glass of equal parts water and place it out of direct sunlight. Be sure to swirl the mixture twice a day for five days. During this period, the gel will ferment, so be prepared as some smell may arise.
At the end of the process, the healthy seeds will sink to the bottom, making it easy to dispose of the gel and weak seeds. Wash and dry the seeds with a paper towel before laying them out in an even layer for drying. Store in a warm location until the seeds are thoroughly dried, which can take several weeks.
Checking to see whether seeds sink or float to determine viability is relatively standard. Testing in both winter squash and melons (like watermelon and cantaloupe) functions similarly. While neither varieties need to be fermented, they do require attention when washing all plant material from the seeds before drying.
Gardening & Outdoor
Shop the best high-performing gardening and outdoor products that impact your health, wealth, and the planet through their use.
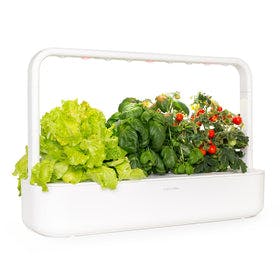
Click & Grow Smart Garden 9
Click & Grow
In Stock
3 Colors
Canarm CORIN LED Black Outdoor Light
Canarm
Out of Stock
Click & Grow Smart Garden 3
Click & Grow
In Stock
3 Colors
Craftmade Aria Outdoor LED Wall Mount Light
Craftmade
In Stock
2 Colors
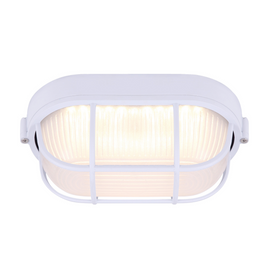
Canarm LOL386WH White LED Outdoor Sconce
Canarm
In Stock
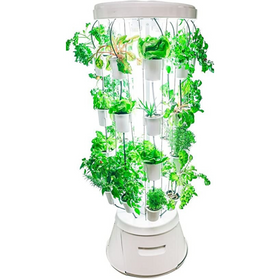
Nutritower Vertical Hydroponic Indoor Garden
Nutritower
Out of Stock
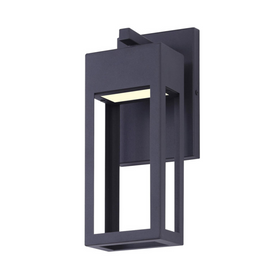
Canarm FAE LED Black Outdoor Light
Canarm
In Stock
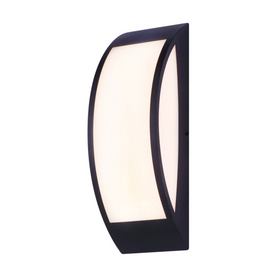
Canarm BARDO LED Black Outdoor Light
Canarm
In Stock
Canarm SINDRI LED Black Outdoor Light
Canarm
In Stock

Canarm LOKI LED Black Outdoor Light
Canarm
In Stock

Where Do I Store My Seeds?
After a season of effort in your garden, you're going to want to ensure your seeds are stored properly. The closer you can get your storage conditions to an ideal state, the better chances you have of your seeds surviving their dormancy to next year.
Make sure to store seeds in a cool, dark place that is free of moisture. Too much humidity or heat could lead to mildew forming on the seeds or premature germination. One way to do this is to seal your seeds in an airtight, glass container.
Don't have a glass container? Not a problem! Coin envelopes are an excellent option for storing small amounts of seeds. Even washed out and recycled pill bottles or cardboard containers can save your seeds until next season.
Ideal Temperatures For Seed Storing
The University of Minnesota Extension has found that temperatures between 32F (0C) and 41F (5C) are ideal for seed storage. Storing in a refrigerator or a freezer can extend the life of your seeds for several years. Though this isn't a perfect strategy and some seeds may not handle it well. Be sure to check if your seeds need any special requirements before storage.

How Long Can My Seeds Be Stored?
The length you can store seeds is going to be dependant on the varieties you are attempting to save. Tomato seeds, when stored properly, can retain their viability for roughly three years. Beans, another popular snack, will preserve for two years in ideal conditions. But some seeds, like those of pumpkins, can store for up to six years!
Some seeds store better than others, meaning you may get additional years using some of your seeds. But, these seeds won't last forever and eventually lose their viability.
When storing seeds for extended periods, you may want to test their viability before betting your spring crop on them. By taking a set amount of seeds and sprouting them a few weeks before spring, you can determine the germination rate and estimate how many you should grow.

How About My Tomato?
Now, let's continue the journey of the tomato seeds we planted in the first article of this series: Growing a Garden: Starting From Seed. You've enjoyed your tomatoes all season! Putting them in salads, on sandwiches, and giving them away to friends and family. But the season is coming to a close, and the last of the tomatoes look ready for harvest.
Taking from the healthiest plants, you collect a basket of ripe tomatoes that will make up your seed harvest. Knowing you need to ferment the seeds, you cut open the tomatoes and remove the gel and seeds with a spoon. Filling the container with equal parts water, you spend the next week mixing the concoction.
Finally, you notice a significant amount of seeds floating at the top as well as a little bit of mold. You remember reading that mold could form and to take extra care when removing the liquid. Once all that remains are the healthy seeds, you wash them a few more times to ensure they are clean.
Laying out the seeds in an even layer over a paper towel, you let them dry for a week in a dimly lit space. In this time, you label your airtight container with "Tomato – Scotia – 2020" and keep it nearby. Once the seeds are dried completely, you put them into the jar and store it away in the back of your fridge until next year.
Seed saving can seem overwhelming to even an experienced gardener. But these are all things we have faced, from growing from seed to maintaining the mature plant. Once we complete the process, turning the closed sign on our little grocery plot, we see how rewarding it can be. Best of all, by taking up this hobby, you are carrying on a legacy that can be dated back to the beginnings of agriculture and human society. So take some time to kick back, reminisce on the last growing season, and dream about what next year's crops may bring.
Tanner Sagouspe
Tanner Sagouspe has a Masters in Environmental Management and is a Permaculture Designer who promotes tackling the climate crisis at home.
